Building a Home in the U. S. Virgin Islands? Why not drop by and visit today? Home Building In The Virgin Islands: February 2006

Thursday, February 23, 2006

We Got Blocks!

click on all images to enlarge
This photgraph shows seven pallets of 8" x 8" x 16", two-void cement blocks.


This shot of three more pallets of two-void cement blocks makes a total of ten pallets. Multiplied by ninety blocks per pallet, we have 900 of the 2,000 blocks on order from the block plant. Right here on St. Croix, a cement block factory, the Superior Block Company, who'd thought?

Ah yes, the sand. This sand is the main additive for the mortar mix. Water and cement are the other two elements in the mix. Water, where are we to get the water to the site? I will see to purchasing a pre-formed, pre-stressed concrete septic tank. Our builder informed me that he usually has the owner do exactly that, purchase the tank that will eventually be your septic tank and have it delivered to the site. In our case we will probably not dig a hole for it, at least not yet.

We intend to store our tank above ground for now, in what will be our front yard, to the south of the house. We will fill it with water for the masons to use to mix the mortar, clean the work tools and the worker's hands too! I haven't seen this yet, but they tell me a pump is used to extract the water from the tank, through a hose and into a plastic barrel for use. we have no power to the site yet, and we are still on a generator for electrical needs.

Tomorrow the Masons begin the walls of the house, stay with us as the house comes out of the excavation, and, little by little, block by block, our new home will be built.

The Leaky Ark

You can see the labor involved in getting the cistern formed and made ready for concrete is extensive. Rebar emerging from the forms; folded or bent to 90° to become part of the roof of the cistern, which will also serve as the first floor of the Gallery and Great Room. There is a pass-through constructed in the center partition between the two tanks, this form will keep the cement out of that area when it is poured.

Later, when the floor is formed and poured, there will be installed two flush hatches for access to the inside of the cistern for cleaning, inspections, or fixing a leak. There will be one in the gallery floor to enter one vessel, and one in our great room floor to enter the second. I will do my best to conceal these somehow, under a rug, or in an out-of-the-way corner. The pass-through mentioned is only for the water

I have been joking with the workers that I didn't think the "plywood ark" will hold water for any appreciable amount of time, what about the seams in the wood? In actuallity our cistern will be waterproofed by a new product to the market called Xypex, an additive that can be mixed with the concrete prior to pouring, or applied later as a slurry mixture to the inside walls of the tank. Applied in either fashion, this product is actually drawn in to the concrete itself by the presence of water. It seeks out water in the curing concrete and reacts to the encounter by crystallization, thus diminishing the size of the pores to such a degree that water molecules will not fit through. Not only does this product seal water "inside" a structure, it can also migrate through the capillaries of the concrete, against hydrostatic pressure from the outside! To find out more, go to their website: Xypex Concrete Additive.

F.Y.I.: This website address, as well as other helpful sites, also appear on our "links section" in the right sidebar.

Tuesday, February 21, 2006

Artistic License


The steel rebar makes a subject for still life photography, resplendent in their rusty elegance. Some of the ties for the foundation forms, these hold the two sides of the plywood form together, spaced at rougly 24" intervals. They are removed and brokern off after the forms are stripped off the cured concrete walls.

Everywhere you look on this tropical Island there are flowers, flowering shrubs, flowering trees, flowering perennials and even budding cactii. This specimen is a Blue Plumbago (Plumbago auriculata), a South African evergreen shrub known for it's lilac blue flowers that bud throughout ther year.


Another shrub that resembles what we know as the rhodedendron, this specimen also produces a similar flower. It is actually a Plumeria Temple Tree (Plumeria rubra), a native of Hawaii, often used in the manufacturing of leis.

Thursday, February 16, 2006

Wooden Ships on the Water

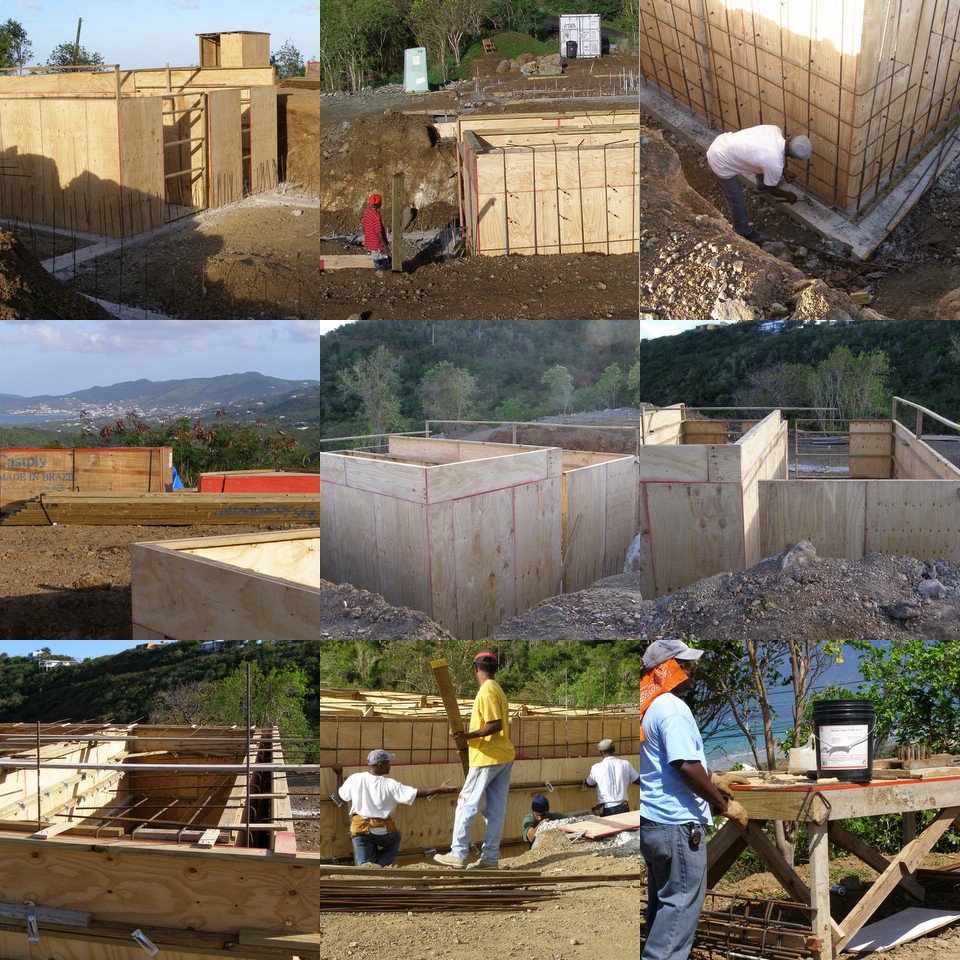
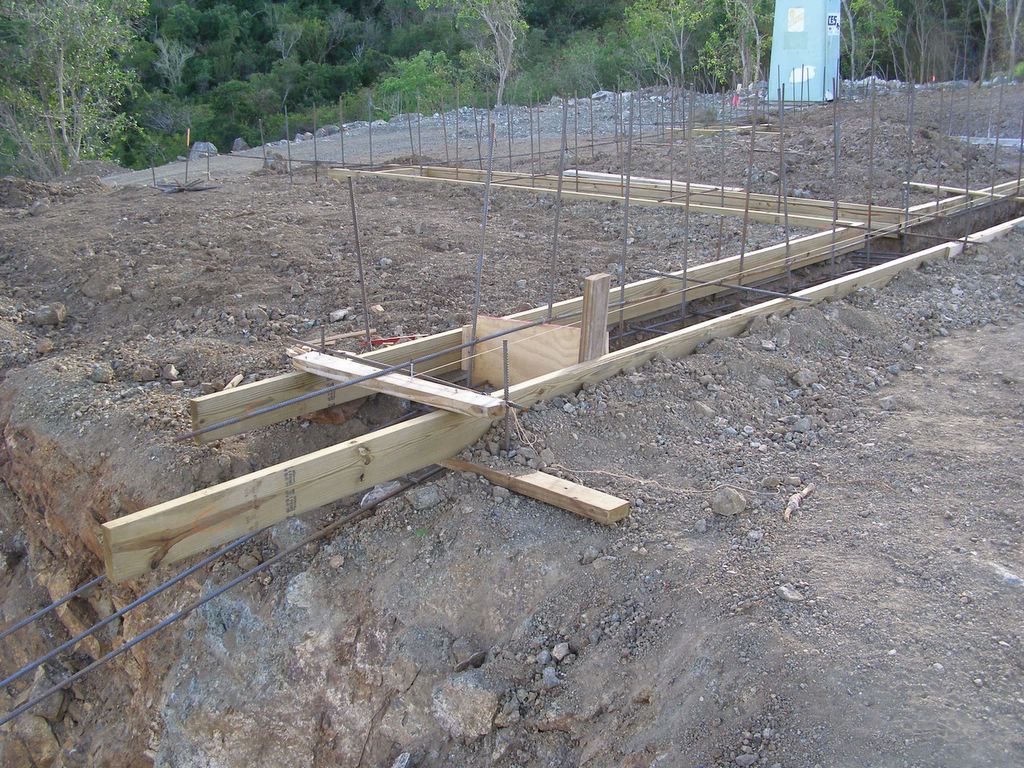
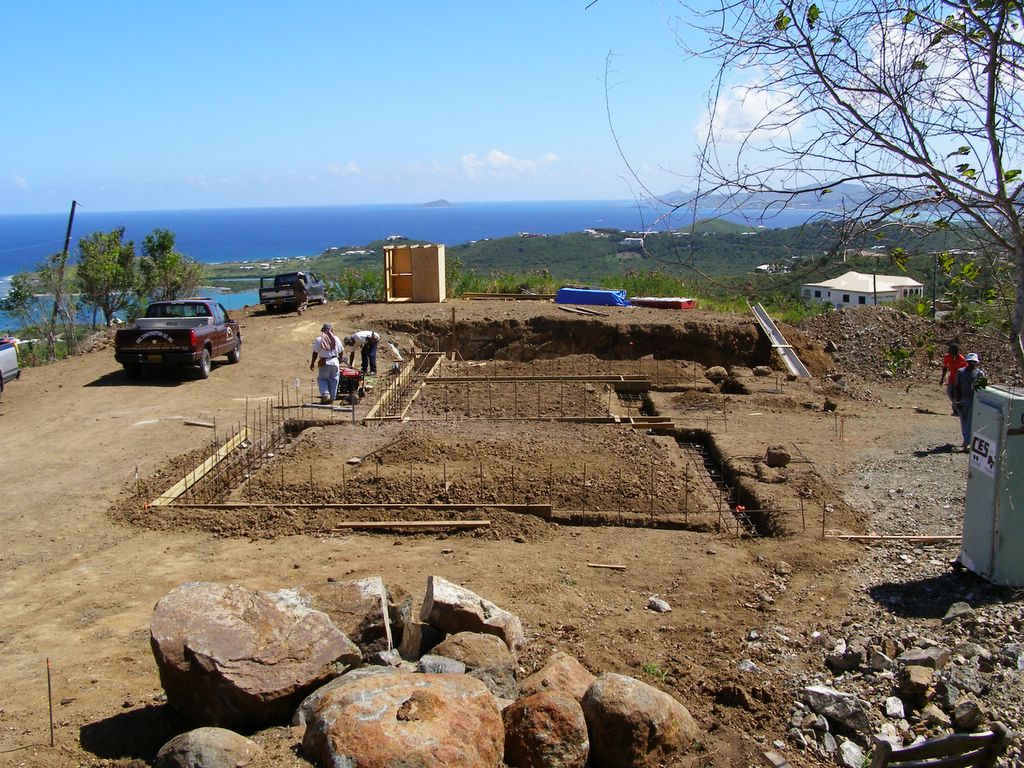
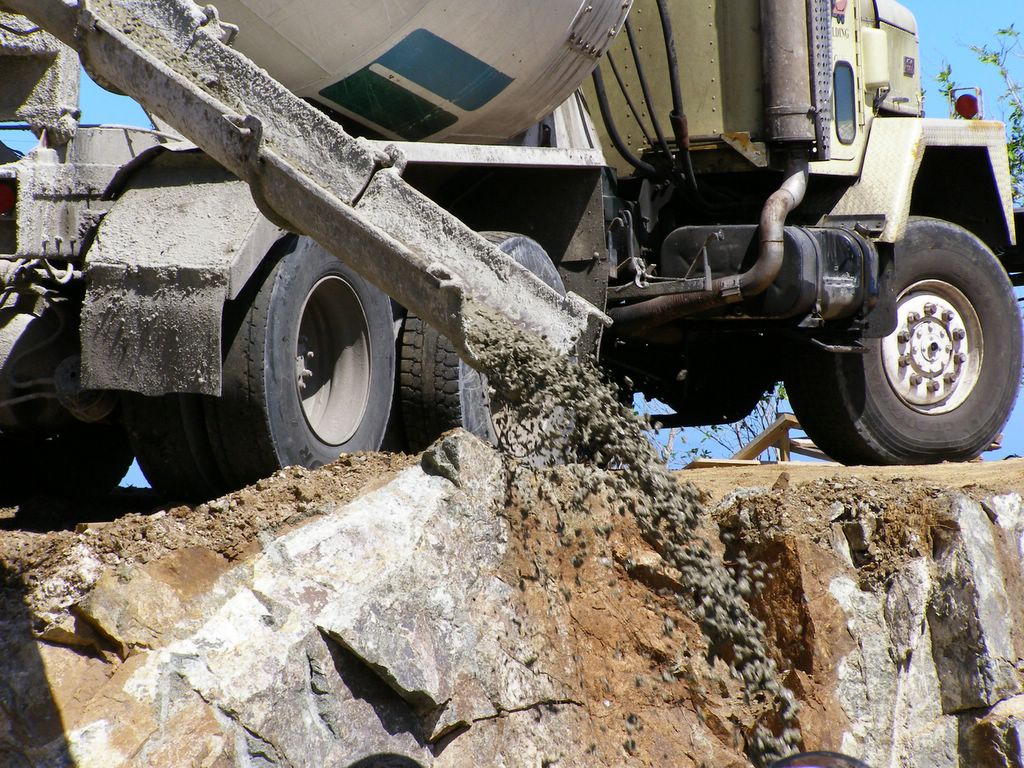
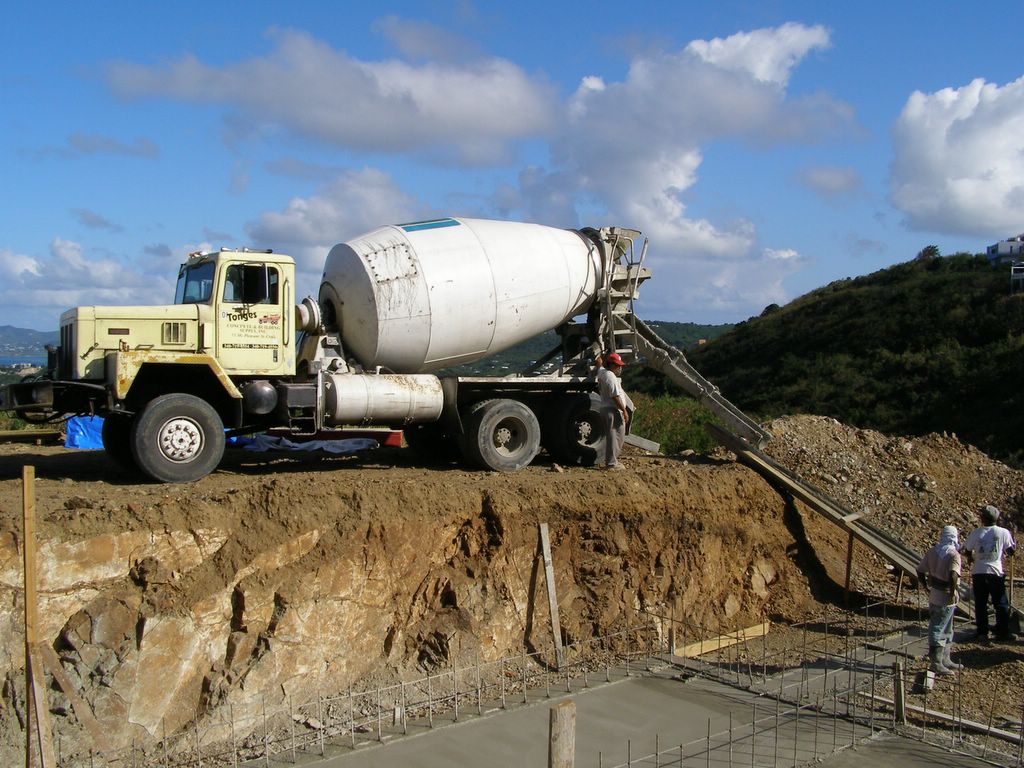
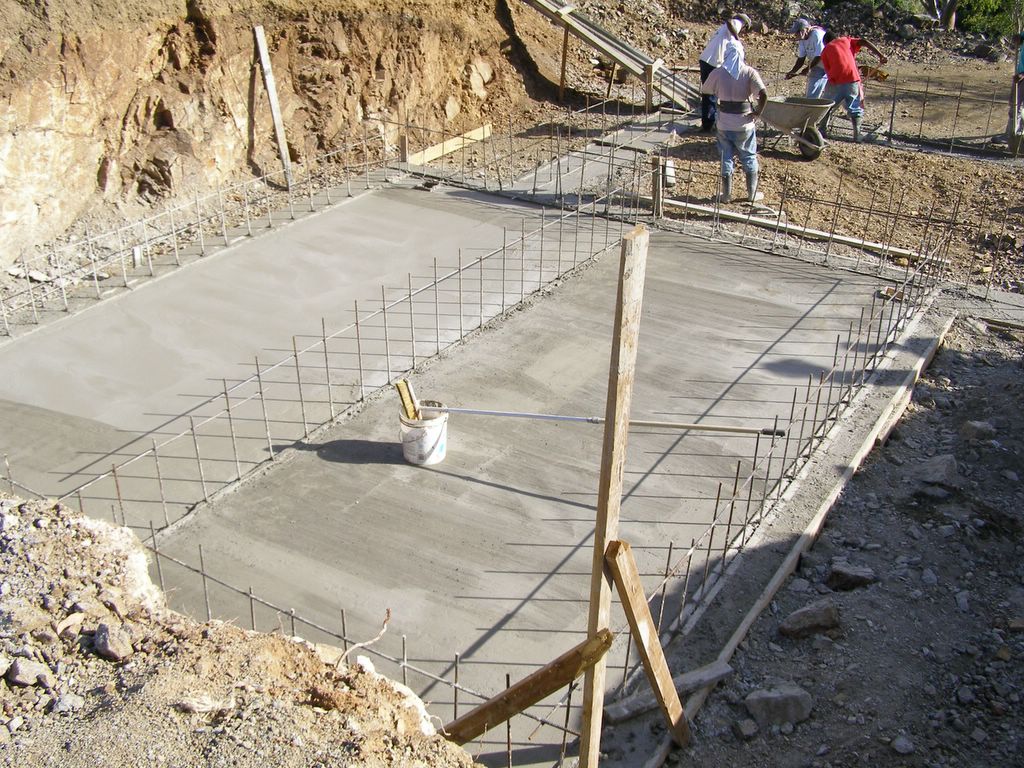
As the first concrete pour continues to cure (for something like the next twenty years or so) the preparations are made for the next batch. In this photo you can see the footing forms as they are laid out on the unexcavated portion of the house foundation. Actually, the digging was done for the footings, the rest of the slab for the first floor will be poured after the walls are erected around each space.

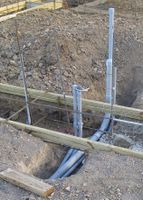
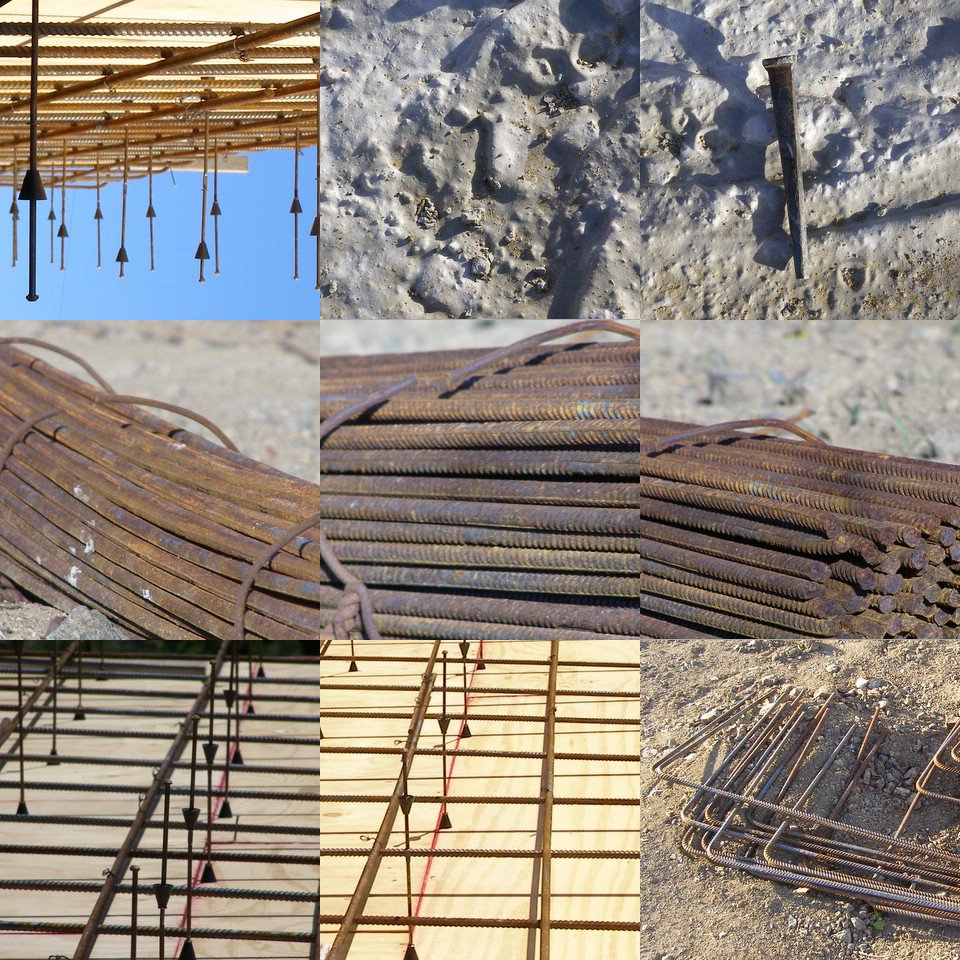
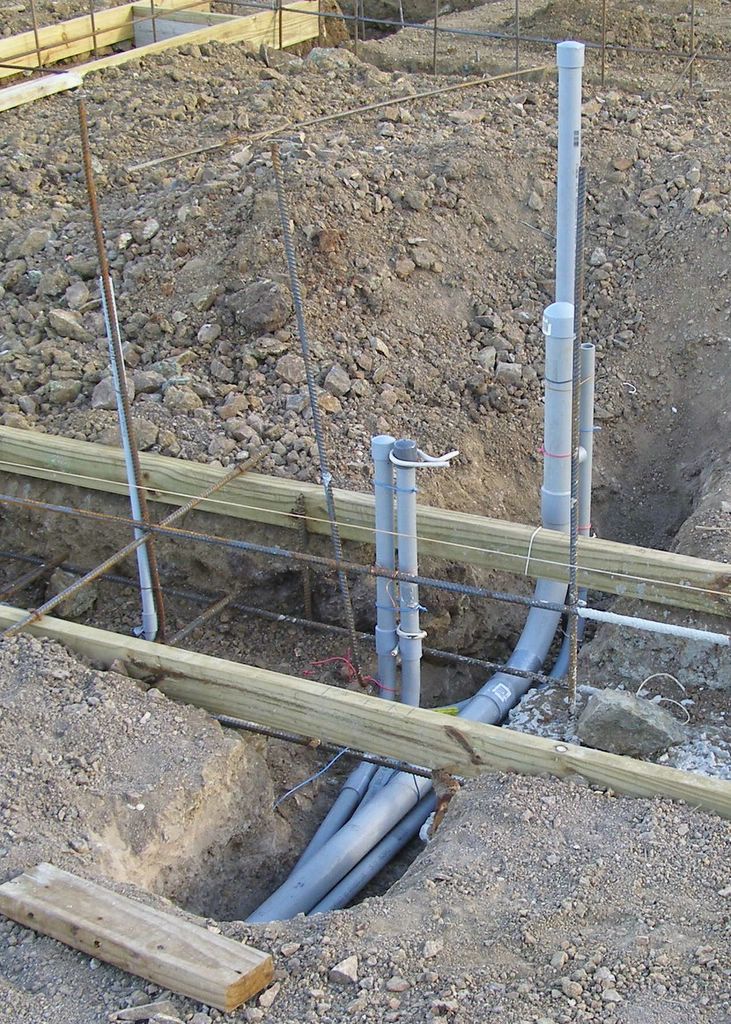
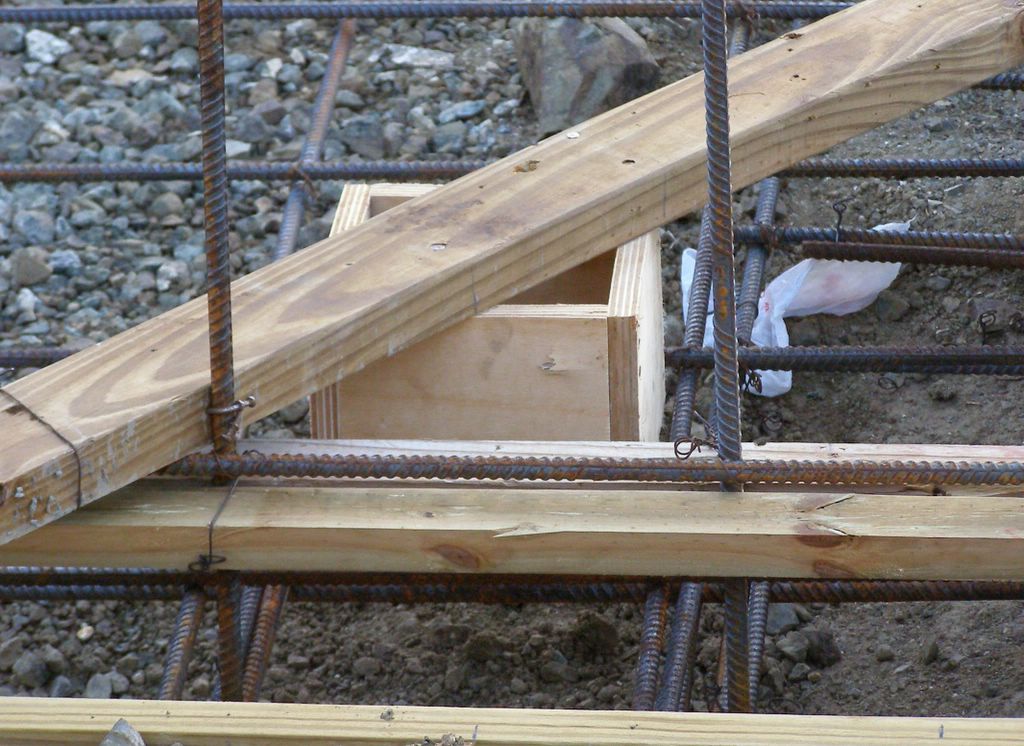
I have begun to install some of the PVC conduits for the electrical wiring, these conduits are for power and communication. Notice that they are installed under the footings and enter the slab, within the walls of the utility room partition. By "inside" I mean the electrical panelboard and communications panelboard are to be installed inside the wall cavity, this practice is often referred to as a flush mount installation.

On the far side of the footing form is a riser containing a 2" conduit, this is for the incoming power conductors, which will terminate in the main panelboard in that room. The main panelboard will contain forty single-pole circuits, there is plenty of room for the various circuits throughout the first floor of the house, with room for expansion, if necessary.

The 1-1/4" PVC conduit is an outbound circuit for the sub-main panelboard in the lower level, apartment, or safe room. Safe room you ask, what the hell is that? It is a place to go in the event of a hurricane where you will be safe from flying debris which might penetrate the envelope of the main house above.

(Kind of like a modern day fallout shelter, minus the radioactivity threat. I am talking about 2 x 4 lumber missiles, travelling at 130 to 185 mph! [Huricane Hugo, 1989]. One survivor friend of Hurricane Hugo says you should consider how all of your belongings would look submerged in your swimming pool!)

There is on piece of 1" conduit which is to feed outbound to the pool equipment shelter, which will house the filters and other devices for the pool's filtration systems, etc. I am thinking of combining the pool equipment shed with a barbeque, flip up the top to grill dinner.

I am early in the design stage as yet, but I am thinking of building a small replica of another house, in miniature, a little scaled down dollhouse if you will. With equipment on one side for the pool, equipment for grilling on the other. A lift up roof will be the access to either side of the dual-purpose unit.

The two 1" conduits in the center of the footing are for the communication cables, television and telephone. These two pipe, along with the 2" conduit will be extended to the front of the property to be connected to a meter pedestal, which I will also design. This pedestal will house the electric meter and disconnect switch for the main house. The telephone and television cables will also be connected to the utilities at that point. Innovative is the company for land line telephone and also cable television service; but their future is a little murky - they have a horrible track record for service and commitment!

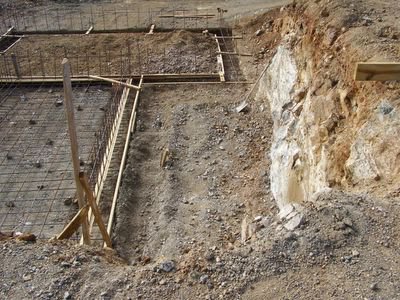
This we fondly refer to this excavation as Chico's room, although it is actually going to be a bathroom and a deep closet, or basement, for me to have a very small workshop. The closet will be in the foreground and the bathroom beyond.

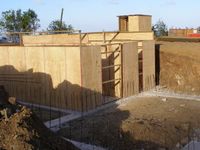
This is the lower view of the cistern, the apartment footings are visible in the foreground. The cistern will be ten feet deep, with an access manhole, for cleaning, located in the gallery floor. Access must be provided for yourself and future homeowners, for cleaning purposes. The reason for the two vessels? If you want to clean the cistern itself, which may take several days to complete, you can lower the water in one vesssel by syphoning off one tank into the other. Remember the little boxes in the floor of each vessel? The debris that is washed off the walls is hosed down along with the effects of gravity guide the water stream to these little catch basins, where the spoils can be easily vacuumed up.

Another thing I learned about water collection systems is that there are screens installed, inside the gutter at every downspout, to prevent larger organic materials from getting into the water supply. Also, for isolating the cistern water from salt water contamination when a hurricane is forecast, there are gate valves installed in the downspouts which, when closed, shed the salt water rain onto the ground, and not into your potable water. Good thinking, eh?

Saturday, February 11, 2006

Forward Progress


This is another shot of Grapetree Bay, taken from the Grassy Point overlook, "lookin' nor'east in this view". The house is under way, as we pour the first batches of the magic slurry, some 20 cubic yards of the gray matter.


In this pre-crete perch photo, I took this shot while sitting in my collapsible oak chair (imported from a yard sale in South Harwich) atop our mound of top soil. It is especially nice in the morning, when you are in the shade of a tree.

Knowing full well that a friend of mine up north is following this blog, page by page, as he relives, vicariously through Debbie & me, his ten year tenure as a concrete man on this tropical island. He emailed me and said the shot of the concrete coming off the concrete truck's chute gave him goosebumps.

These Cruzans have a way of making do with whatever is available, in every situation! In this shot, you can see the truck's concrete "chutes" or the gutter-like troughs, used to direct the fluid concrete into the areas being poured. Look closely at the extension chute the Cruzans made, it is a couple of pieces of old corrugated steel roofing, nailed to a few old 2 X 4's. This particular model was made on the job, since I was told the last one they had was in pretty bad shape, it makes me wonder sometimes what "bad shape" actually means to these people.

They call it innovative thinking. I call it "Island Living", where one is often without the proper parts needed for every project, and, instead of being defeated by the experience, one makes-do with available materials. I ran into this phenomenon when I lived on Nantucket Island, thirty miles off the coast of Cape Cod, in Massachusetts.

Maybe this view of the cistern floor will give you an idea as to how large the cistern will actually be. This is a view before they form the walls of the two halves of the vessel. Notice the rebar, as it is poked up out of the concrete slab, these will be extended to the top of the wall, within the wall cavity. A second piece of steel is wire tied to the stub; will extend out the top of the poured wall and will be and utilized in the construction of the concrete "roof" over the two tanks. This poured steel-reinforced concrete roof will be the floor of the gallery porch and part of the great room, directly above each tank section. One man's ceilin' is another man's floor.... (Paul Simon circa 1968, I think).

This concrete slab that will be poured later, is actually referred to as a structural slab which basically means it has lots of steel rebar reinforcing and can withstand a great deal of weight before giving way.

Where the workers are congregated, in the upper left corner of the photo, they are making sure to distribute the concrete evenly for the footings of the apartment and safe room. In the foreground, barely visible in the shadows, is what will be our new space created by Chico, when he removed more stone than was necessary during the excavation phase.

The footing forms are not yet set for this new space, that's slated for next week!

Thursday, February 09, 2006

Let it Pour!

click on all images to enlarge

And so we enter the construction phase, this is a perfect follow up to doing practically nothing the past month or so, as the hole was dug deeper and ever deeper into our pockets.. er.. ..I mean the earth.

Much hand work was necessary to dig the footings around the perimeter of the cistern, in the background in this photo, and the apartment in the foreground. The footings are 12" deeper than the rest of the slab itself, which is the floor of the cistern, will be six inches or so thick. Notice the vertical steel reinforcing bar (rebar) which is stubbed up into what will be the poured concrete walls of the cistern, these are placed on 12" centers, in line with the rebar you see in the flat areas.

Because this is a poured concrete cistern you can also notice some wooden members tied in place around the perimeter, these will actually be pulled out after the concrete has cured. The resultant rabbet, or slot, is called a keyway, this will hold the poured concrete walls in place, permanently locking them to the footings. There is a center partition within the cistern itself, you can see the stub-ups of rebar set in place. This center partition is going to support the great room wall above it and it divides the cistern in half. This partition will not have any stresses on it, therefore it doesn't need a keyway to lock it in place. There is a washover window cut into the center partition, which will balance the amount of rainwater in each tank.

This close up photo shows clean-out trap, installed in one corner of each cistern half. The concrete floor will be troweled so that it is pitched to that corner. This is used when cleaning the cistern on the inside and is a very important step. Our cistern will hold approximately 33,264 gallons of water collected, hopefully, off the roof gutters, leaders and downspouts. Filled to capacity it will weigh-in at 57.7 tons, and that's without the weight of the concrete under-house swimming pool!

This concrete box must be water proofed on the exterior also; this is done as we do up north, with foundation tar. Black, gooey and stinky, Debbie and I can attest personally for the experience, having done our Harwich house back in '95. Don't get any on yourself if you can help it. We are not going to tar this cistern ourselves, we are paying somebody to do that for us.

I am going to waterproof the inside of the cistern with a fairly new product called Xypex. This product can be added to the concrete batch, slightly before it is poured into the forms, or, it can be mixed with water and which forms a thick slurry liquid the consistency of wallpaper paste. This product is then brushed or rolled on the inside of the tank, from top to bottom, every surface that will get wet inside the cistern. Before the Xypex is applied, the walls and floor are first wet down, it then permeates the solid concrete, drawn into the concrete by the water itself. Once the slurry is applied and allowed to react with the chemicals present in the concrete itself, the tank is protected from water incursion from either the negative or positive side of the tank.