Building a Home in the U. S. Virgin Islands? Why not drop by and visit today? Home Building In The Virgin Islands: March 2006

Tuesday, March 28, 2006

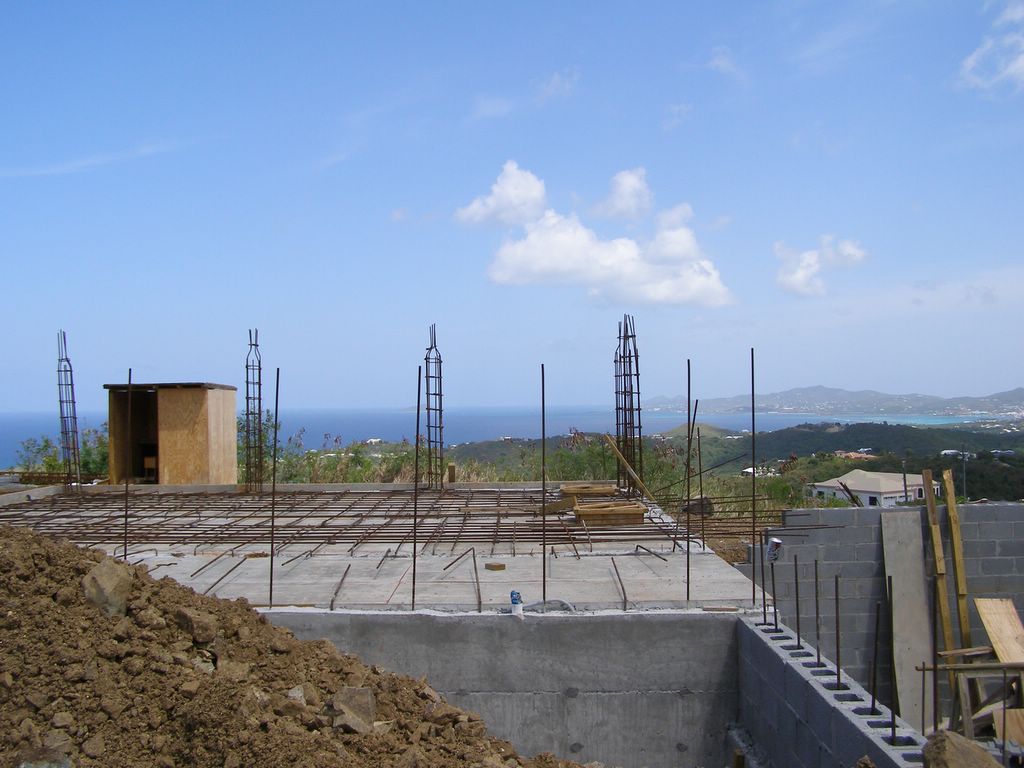
Floor Slab Preperation


click on all images to enlarge

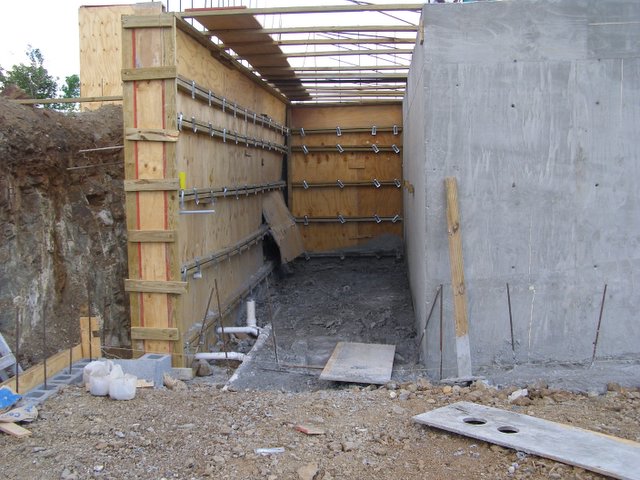
The plywood forms, nailed against the concrete block foundation with old fashioned cut nails. Cut nails earn their distintive name from the manufacturing process that produces them. The individual nails are actually cut from a slab of hot tempered steel. Tempering, which serves to harden the steel, is accomplished in a series of heating and cooling cycles - the more cycles - the harder the steel. The hardened steel is also very brittle (read: many cycles = very brittle steel). This brittling affects and enhances the cutting process, which occurs within a very noisy building, as the termpered steel slabs are cut with a massive blade, which very much resembles a guillotine. The individual nails are spit out into buckets. I have witnessed the process in the Tremont Nail Factory in Wareham, Massachusetts, frascinating old machinery making the same product for over a hundred and fifty years.

Most nails these days are made of varying thicknesses of steel wire, and are "drawn" to their finished dimensions by machines called extractors, the heads are dimpled or flattened; the business ends cut to a chisel point, like a carpenter's pencil.

What is the big deal with cut nails? An old technique (nailing into concrete by hand) still in-use here in the USVI! The process works for them, but it would (and does) drive any continental builder up the wall. Power activated nail guns are used and they actually drive screws into cement back home. I will show you some close-up photos of the process when the time comes to illustrate it properly for you.

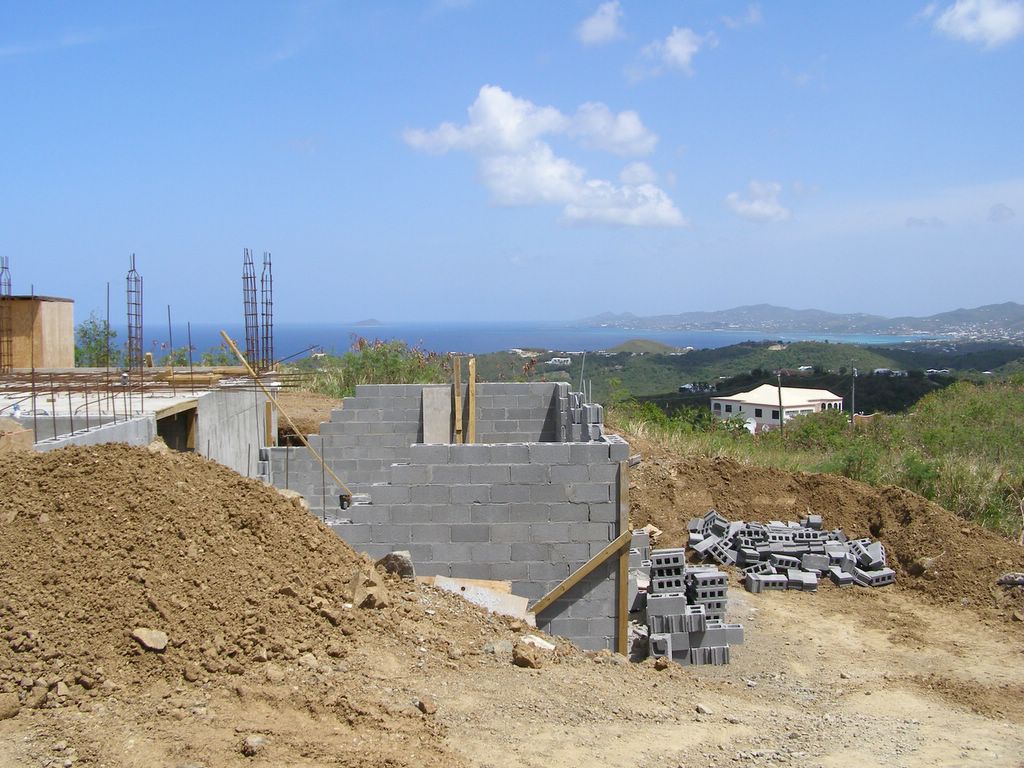
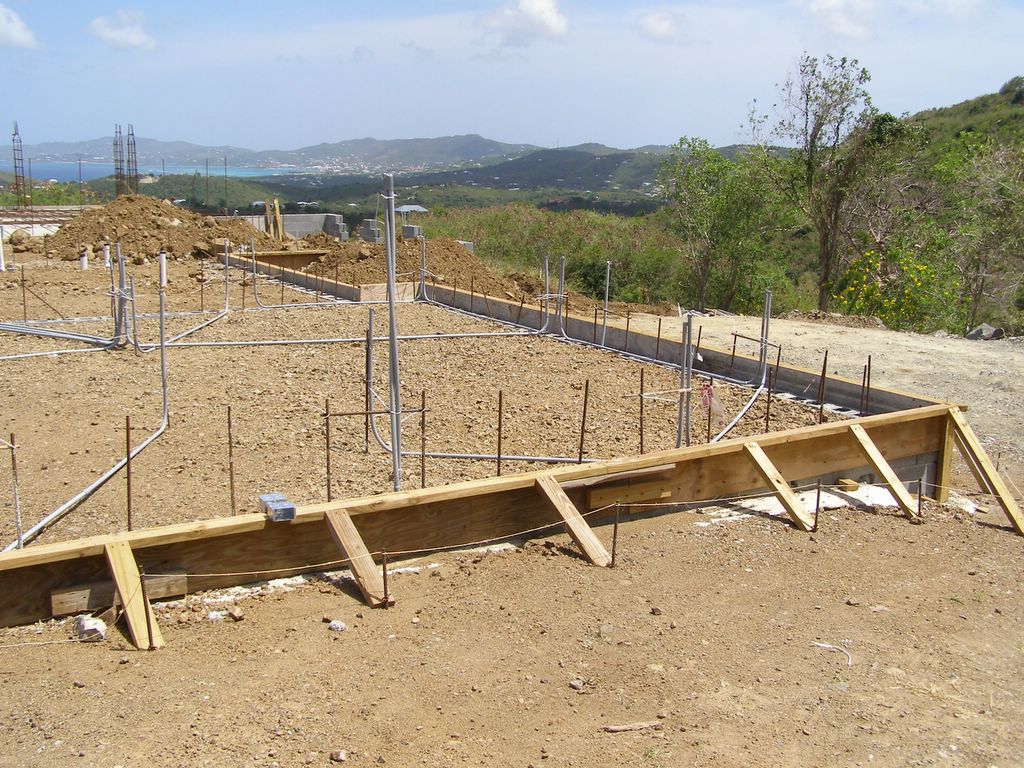
Looking east, over Chico's room, across the end of our Great Room, you can see what is left of the hole dug-too-deep, as it is being filled with previously excavated material and made ready for laying down steel rebar, pouring concrete and one day maybe we'll actually be living here! The reality hasn't even sunk in yet for me; I think Debbie feels the same way - living the dream feels just that way to me - hard to grasp.

Monday, March 27, 2006

Maritime Heritage & Cheap(er) Gasoline

click on all images to enlarge
This is a photo I took of this mega yacht tied up at the St. Croix Marine, it has been stylized in my photoshop program to appear as a painting. Visitors like this sailboat (with their owners) are tying up on this Island, because of the oil refinery here. Once Hess Oil; now locally owned and called HOVENSA, it is the largest refinery in this hemishpere. In the early 1960's, Mr. Hess promised the Islanders cheaper gasoline and diesel fuel for allowing the construction of his behemoth air polluter.
Unfortunately for the locals, and I suppose for visitors too, are the independent gasoline dealers, who are unscrupulous in their price fixin' ways. However, we did visit St. Thomas earlier this year and found the price of gasoline was .70 cents costlier per gallon on average than St. Croix. Go figure, who knows what the price would be without the refinery in the picture? Off the charts no doubt!
To wander back to the point, the cheaper gasoline is a real factor given that these vessels can hold 10,000 gallons (or more) of fuel... ...therefore, with a $1.00 per gallon disparity in price. Let's see, multiply $1 x 10,000 and you get....... well, you do the math! Thanks Mr. Hess, I guess!

Caribbean Standards


click on all images to enlarge

In these photos you can see the extent of the work involved in getting the first (main) floor slab ready for the concrete pour. The entire foundation perimeter will receive wooden forms such as these to hold back the concrete and make a perfectly level benchmark for the floor masons to use as a guide. The first floor masonry walls (in this case the lower safe room walls) have to be continued to a height


just under the first floor ceiling, enough to allow for the casting of a collar beam, which will encircle the rim formed by the top of the walls of the lower level room. As it is right now, the last course on the east wall (furthest from the camera) must be removed to accommodate this important strutural element.

I should explain a finding I have made concerning what a professionally engineered building means to these Cruzan homebuilders. In a word - nothing! A "Caribbeaan Standards" engineered building, is built to withstand tremor after tremor. Yes, as in earthquake; we've already had 200 to 230 tremors this year, the epicenters of which were some forty miles north of St. Thomas!
Caribbean Standards means everything, according to our builder, Mr. Arnold Jeffers. Arnold was born and raised on the once British Virgin Island of Nevis, most often heard in conversations about her sister Island of St. Kitts. St. Kitts /Nevis is now self governed.

Caribbean standards refer to the solidly built concrete and concrete block houses (such as our own) that the natives build here in St. Croix in particular and all over the island archipelago. Prepared for anything, understand that the hurricane is the number one fear of every local resident, native to no one Island in particular, the fear is in their blood, from generations of experience. The concrete block houses, with interior as well as exterior walls of blocks, are braced for the worst weather imaginable. 100% poured cement is the only other building medium that is stronger than concrete block construction.

I have joked that these houses have more steel imbedded in the cement than the Big Dig project in Boston, Massachusetts. The footings are not footings, they are grade beams, with double 5/8" steel rebar, and stirrups every 12" along the length of the excavation. Each piece of steel is wire-tied to each other for rigidity, before the cement is poured. From the footings there are vertical risers, also tied to the footing steel rebar. Rebar city.

Sunday, March 26, 2006

Concrete vs. Plywood

From the evidence presented herein, we will determine culpability in the disasterous concrete pour for this second set of walls. Don't ask me why they formed and poured these two walls, instead of using concrete blocks. I thought it a good idea to pour the cistern walls, since it is designed to hold water. What do I know?
The plywood panel hanging out an an oblique angle is indicative of concrete form failure due to improper bracing, and shear bullheadedness (is there such a word?) on the the part of the job foreman.
When the cement was poured out of the truck, onto the chutes and into the forms. There was even a device set up to help direct the concrete into one confined area, directly under the chute. If you understand anything about fluid dynamics you should understand this - water doesn't compress - nor does aggregate; most especially blue bitch granite aggregate.
Witness the cement mix running like molted rock into the chutes of the concrete truck, see it curl it's way downward and into the chute, ever so effortlessly. Listen to the stones of the aggregate as the chafe each other and the steel chute, ringing like one rushing train of motion. Listen as the forms creak and groan from the abundant weight of the mix; roughly 7 yards @ 2.5 tons per yard / 35,000 lbs , or 17.5 tons. Notice that the concrete isn't flowing as you would have hoped, and instead it is building increasing pressure right where you are pouring the weighty slurry. A very load bang follows, with the sound of a crackling fire, as the braces and plywood fly about the area that was to be our basement room (dubbed Chico's room). The form blew open and dispensed the concrete, and, with the aid of gravitational pull this was occurring too rapidly for anyone to plug the leak.
Luckily no-one was hurt, since there was no-one in the basement room at the time of the blow out. Had there been anyone down there, the would have suffered bone crushing injuries, as the double 2 x 4 braces were literally severed at their ends in the explosion of gray slurry, the plywood forms broken in clean lines as though cut with a circular saw! With the force of the blast wood members flew everywhere, as if escaping from the concussion; the whole mess of lumber and cold, molten cement quieting down in waves.
This disaster didn't bode well for the workers, since it was at the end of a long day that this event occurred, and their work as yet unfinished. Cleaning up the mess was an imperative, since the room would be lost to the onslaught of concrete, the ooze seeping into everything, including the plumbers soil pipes jutting out of the uneven an unruly concrete layer.
By Friday afternoon, they had cleaned up the area and reset the forms for the repour. Braced now to the nines, the forms were not to collapse with the introduction of "the mix", not this time. The concrete repour went exceedingly well, as if the workers used the force of their collective will to make this happen, they had a long hard and unproductive week and the weekend stood before them, and much needed rest.
Posted by Picasa

Blown Out Form

Concrete is wicked heavy stuff. Note the plywood panel at the end of the room on the left, this is not a good thing. If you look closely you can see the two 2 X 4 members nailed together lengthwise, that comprise this site-built concrete form system. The first and second pair of 2 x 4's, once holding the form together are non-existent in this shot, taken the next morning. During "the event" the guys tell me, the concrete was flowing onto the chute and out of the truck rapidly, as they unloaded the entire batch (7 cubic yards) in one area, instead of using a pump to dispense the liquid alternately in different areas.
The form kept filling up with concrete, stones and sand and water, the water acting as hydraulic fluid, unwilling to compress. As the stones that comprise the aggregate mix are forced down on top of each other with such force that all at once the 3/4" plywood, it's supporting cast of double 2 x 4's and steel snap ties gave way. The noise was horrendous as the concrete burst through the plywood and pushed the 2 x 4's out of the way, literally snapping the boards at the point the plywood panel was joined to the next sheet. The plywood looked as if it had been cut partially through with a circular saw, the line of severance was so distinct.
The braces were thrown acroos the room with such force that if anyone had been standing in that lower room (there was not) they would have probably lost the ability to walk, since in the flash of a second the boards were jettisoned, at about knee and ankle height, into the opposite wall of the room. Word was they bounced around in there some... before they went silently still.
As you can imagine, the excess cement, now following gravity's path, was flowing out of the open form and onto the floor of our new room. You can see the plumber's pipes sticking out of the floor in the middle of the room and the space looks pretty disheveled with concrete slag everywhere.
After working all day, the workers had to then remove the excess concrete, which covered everything. If they hadn't done this, the plywood and other parts of the forms would be inretrievable, being perpetually cast in cement.
The concrete was poured late afternoon Monday, they worked for the next four days completing the clean up rebuilding the form and repouring the concrete (yes, we also paid for the second load of cement).

Thinking about it today, the wasted concrete weighed in at about 17.5 tons, most of this weight having to be re-lifted and redeposited somewhere other than inside that space. Everyone earned their pay that week.

Saturday, March 04, 2006

Photo Enhacement

As is always the case with the photos I display on this blog, they are fully enlargable for easier viewing and to optimize detail recognition. To enlarge any image on this site, hover over the photo with your mouse pointer until a hand appears in the place of the pointer. This hand is like a magic wand that will, when clicked, enlarge the photo you are viewing.
Once the photo is enlarged on your PC, you will notice a popup display in the upper right of the photo - ignore it, and, if you hover the pointer over the enlarged photo, an icon appears in the lower right of the photo that resembles a cheesburger with arrows pointing in four different directions. Don't ask me what the icon is supposed to signify, or resemble, just clik on it, and bingo - (presto?) the photo will enlarge to the largest scale, in most cases covering your screen. Use it as a desktop background, or just to get a closer look, whatever. JUST DO IT!

Thursday, March 02, 2006

Layin' Cement Blocks


click on all images to enlarge

As you can see from these photos, the concrete for the cistern is being poured and the cement blocks have arrived, we are underway with the masons taking the court. Clockwise from top left: John is the lead mason - and besides being at his best when laying block - it is also what he enjoys doing the most.

Behind the cement truck is another trailered vehicle, this is a concrete pump. Notice the concrete mix is poured into the hopper of the pump where it is pushed through a hose to the applicator. The applicator, shown with hose in hand, ensures that the mix is poured properly between the plywood forms.

In the last photo, those are John's hands is laying the very first cement block to be set (of 3,000 or so) for the foundation of our home. This first course of blocks sets the level of the floor inside the finished house.

Remember that the footings were dug by hand and subsequently were dug as deep as necessary to allow at least an 8" thick footing in virgin earth (read: not previously excavated). Inside those poured footings is as much steel rebar as was used on The Big Dig project in Boston (just kidding, but there was a lot). In our world these are not footings, they are grade beams.

Since there are several different levels of footings, the foundation consists of the subsequent courses of blocks necessary to complete bring all courses to the same floor elevation. Once these courses are set the interior of the foundation walls can be filled with excavated materials and brought to the same height inside the walls. This filled area is then compacted with a machine, to ensure that there will not be any settling after the house has been perched here for a time. A wooden concrete form is then installed around the foundation walls, in preparation for the poured concrete slab, which will be our main floor.

Next comes the plumbing and electrical, which must be installed before the floor can be poured. This is the next step - plumbing and electrical rough-in - stay with me... more tomorrow.